
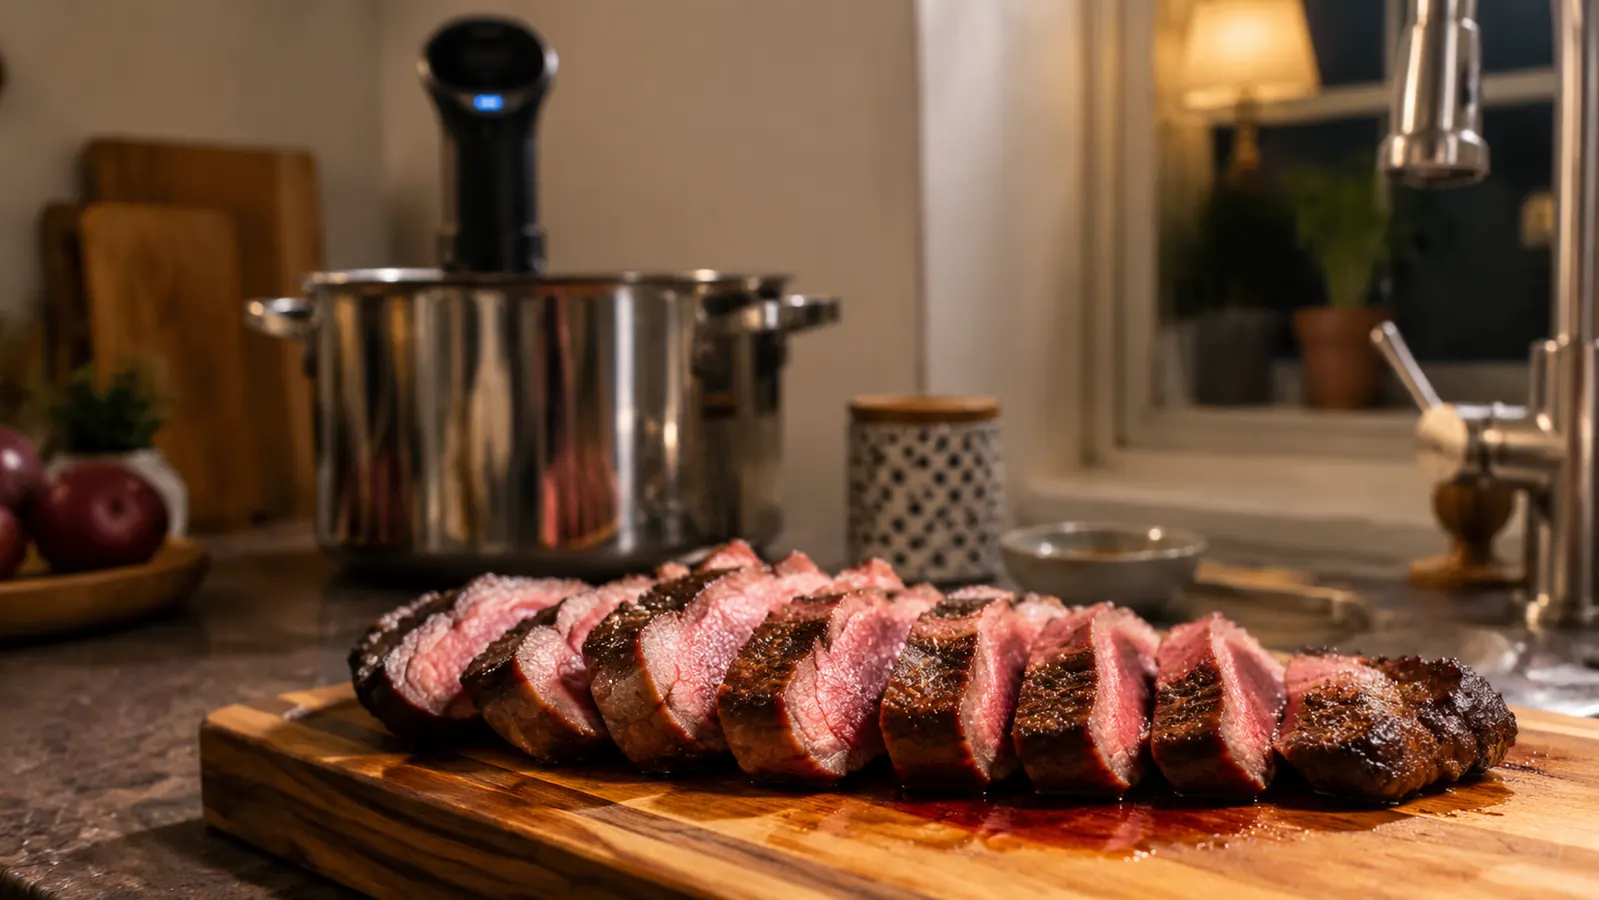
For twenty years of recipe-testing, steak was the one thing I couldn't guarantee. I could nail a braise, I could time a roast to the minute, but a two-inch ribeye on a hot pan turned into a gray-edged guessing game every single time, and I was the one everyone in my house watched me cut into it to see if we'd won or lost. Sous vide is the thing that fixed that, and specifically it was the Anova Precision Cooker that finally lived on my counter instead of in a cabinet I forgot about.
This isn't a theory piece. It's the exact method I use every time I run a steak through my Anova, from bag to bath to sear, written the way I'd walk a friend through it standing at my kitchen island. Follow these five steps and you'll get edge-to-edge doneness on the first attempt, not the fifth.
Tired of cutting into a steak and hoping you guessed right?
The Anova Precision Cooker 2.0 holds water temperature within a degree, so the steak comes out exactly as done as you told it to be, every time, whether it's a budget chuck steak or a special-occasion ribeye.
Amazon Check Today's Price on Amazon →Step 1: Pick Your Cut and Set Your Target Temperature
Sous vide rewards cuts that used to scare people off. Ribeye and strip steak are the easy wins because the fat renders beautifully at a low, steady temperature, but this is also where a cheaper cut like chuck or flank earns its keep. I've run a budget chuck steak at 131 degrees Fahrenheit for 24 hours and served it to guests who assumed it was a premium cut, because the long, gentle bath breaks down connective tissue that a hot pan alone never touches.
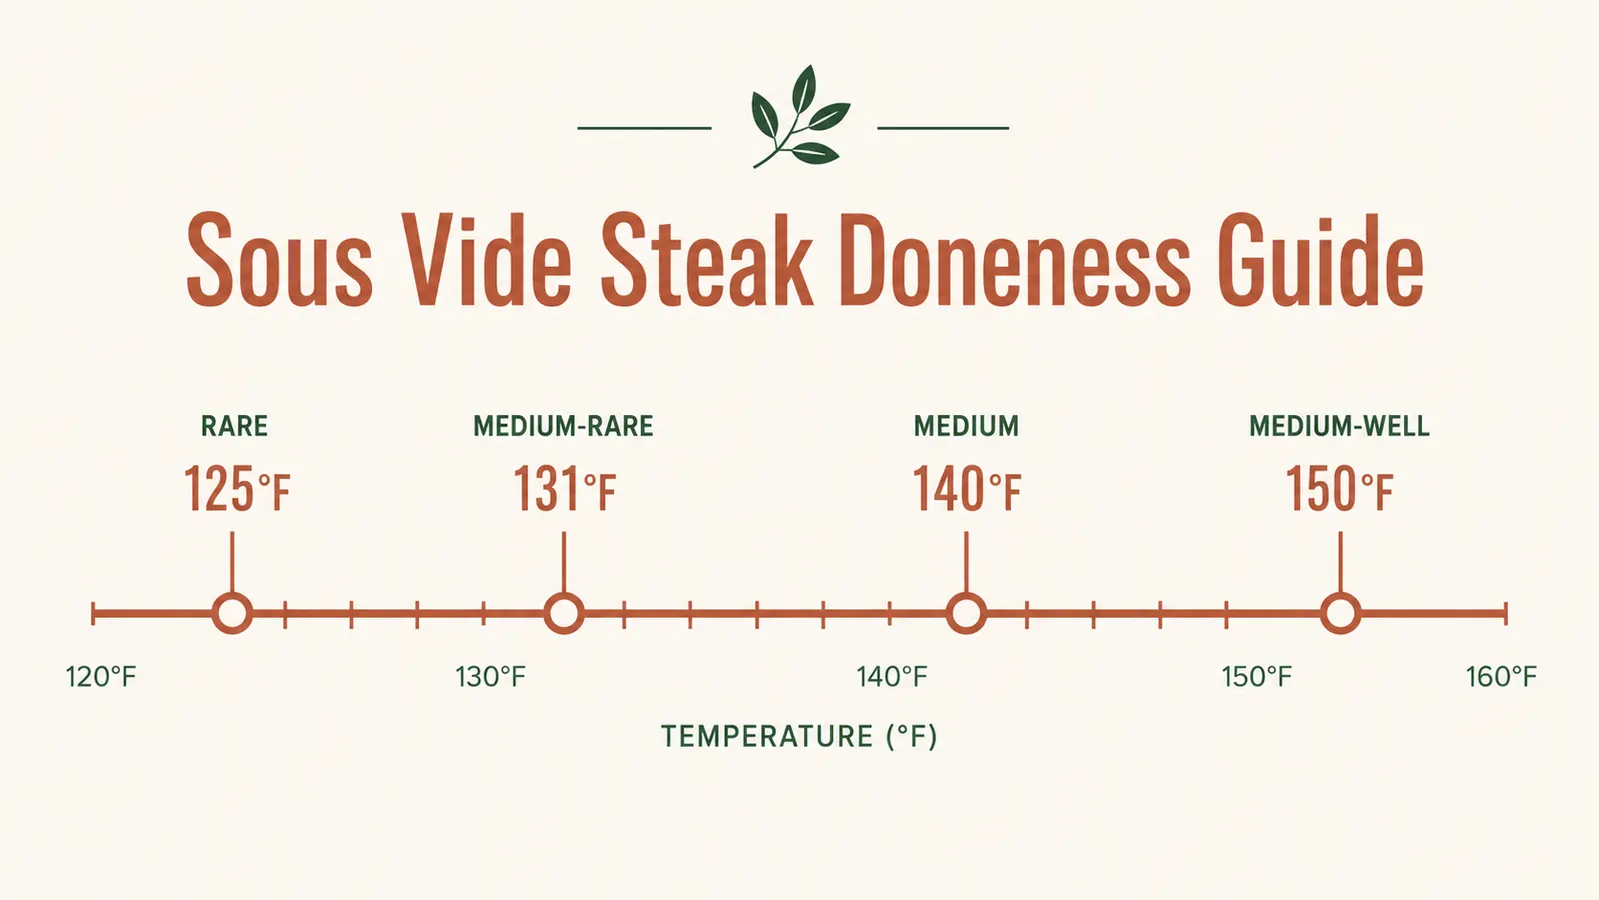
Temperature is doneness, full stop. That's the entire mental shift sous vide asks of you. I run 125 degrees for rare, 131 for medium-rare, which is where my family lives 90 percent of the time, 140 for medium, and 150 for medium-well. Write these down somewhere you'll actually see them, because once you stop second-guessing doneness by touch or color, you stop babysitting the pan.
Thickness matters almost as much as cut when you're picking your target time. A thin sirloin under an inch will hit temperature in under an hour and doesn't need much beyond that in the bath. Anything over an inch and a half changes the whole plan, since it needs longer at temperature to make sure the center actually catches up, not just the surface. I keep most of my steaks close to 1.5 inches on purpose now, thick enough to get a real sear without drying out the interior, thin enough that I'm not waiting three hours for dinner to start.
One thing I learned the hard way in my first month: don't chase a temperature below 125 for beef. It's food-safety territory that the Anova app will actually warn you about, and it's not worth the risk for a texture difference most people can't detect anyway. Set your number, trust it, move to the next step.
Step 2: Season, Bag, and Clip It Into the Bath
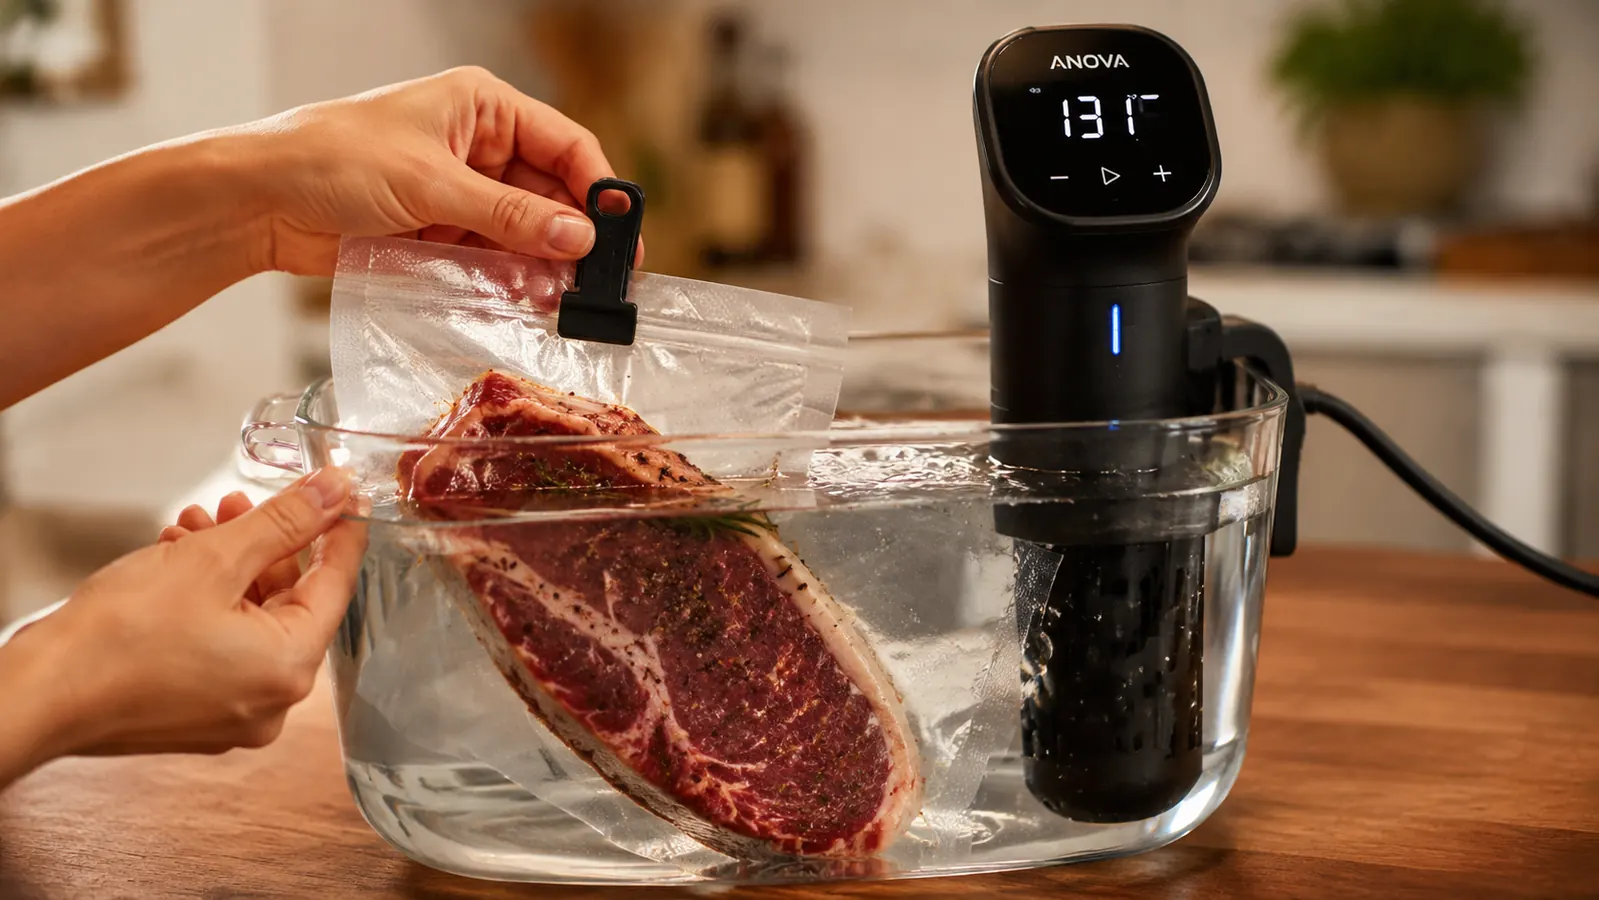
Season simply before bagging. Kosher salt and black pepper on both sides, nothing fancier, because anything with a lot of moisture like fresh garlic or soy-based marinades can turn slightly metallic or overly intense over a long cook. I save the aromatics for the sear, not the bag. If I'm adding a sprig of rosemary or a smashed garlic clove, it goes in the bag as a background note, not the main event.
For the bag itself, a zip-top freezer bag with the water displacement method works fine for a weeknight steak, and I still use one when I'm cooking for two. Lower the bagged steak slowly into a container of water until the seal line is just above the surface, let the water pressure push the air out, then zip it closed right at the waterline. For anything I'm running longer than four hours, or batching multiple steaks at once, I switch to a proper vacuum sealer, since a loose seal on a 24-hour chuck cook is the one mistake that can actually ruin your dinner.
Clip the bag to the side of your container so it hangs fully submerged and doesn't float against the heating element. My setup is a 12-quart stockpot with the plastic lid cutout for the Anova's clamp, and once that clamp is snug, the machine does the actual thinking. Set the timer for your target time, walk away, and go do literally anything else. That's the whole appeal.
Water temperature out of your tap matters more than people expect. Filling the bath with warm tap water instead of cold gets the Anova's 1000-watt heating element to target noticeably faster than starting from an ice-cold container straight out of the fridge. I fill mine with warm water whenever I remember to, and it shaves real minutes off the preheat, which means dinner starts closer to when I actually wanted it instead of thirty minutes later.
Step 3: Let the Bath Do the Work While You Time It Right
Timing in sous vide isn't about racing the clock, it's about hitting a window. A 1.5-inch ribeye needs roughly 90 minutes to fully reach 131 degrees at the core, but it can safely sit in that same bath for up to four hours without overcooking, because the water temperature IS the maximum temperature the meat can reach. That's the safety net that makes this method so forgiving for a weeknight where dinner keeps getting pushed back.
For a standard 1 to 1.5-inch steak, I aim for 90 minutes to 2 hours. For a thicker cut, closer to 2 inches, I stretch that to 2.5 hours to make sure the center actually catches up to the water temperature, not just the surface. Tougher cuts like chuck or flank benefit from going long, 12 to 24 hours, which is where the collagen actually breaks down into something tender instead of chewy.
This is the step where I used to hover, and don't. I set a kitchen timer, or let the Anova app send a push notification, and I go do homework with my daughter or start a side dish. The whole point of a circulator is that the water bath doesn't need supervision the way a stovetop pan does. If you're standing over it checking every ten minutes, you haven't actually adopted the method yet.
Step 4: Pull, Pat Dry, and Prep for the Sear
When the timer goes off, pull the bag out and open it over the sink, since a fair amount of liquid comes out with it. Set the steak on a plate lined with paper towels and pat it completely dry on both sides. This is the single most important step people skip, and skipping it is why a lot of first-time sous vide cooks end up disappointed by a pale, steamed-looking crust instead of a real sear.
Wet meat can't brown, it just steams in the pan, so I go through two or three paper towels per steak without feeling wasteful about it. If I have a few extra minutes, I'll let the patted-dry steak sit uncovered on a wire rack for five minutes before searing, which dries the surface even further and gets me a noticeably darker crust.
If you're working with a steak over two inches thick, there's a trick worth knowing: sear it hard and fast as described in the next step, then rest it briefly rather than searing longer to compensate for the thickness. A longer sear on an already-cooked interior only pushes a gray band inward from the crust, which defeats the entire point of the method. Trust the bath to have already done its job and keep the pan time short no matter how thick the cut is.
Now is also when you get your pan ready, because the sear needs to happen fast and hot right after the steak comes out of the bag. Get a cast iron or heavy stainless skillet on the highest burner setting your stove has, and let it preheat for a full three to four minutes before the steak ever touches it. A pan that isn't hot enough is the second most common reason people say sous vide steak came out gray instead of crusted.
Step 5: Sear Hard, Fast, and Finish With Fat
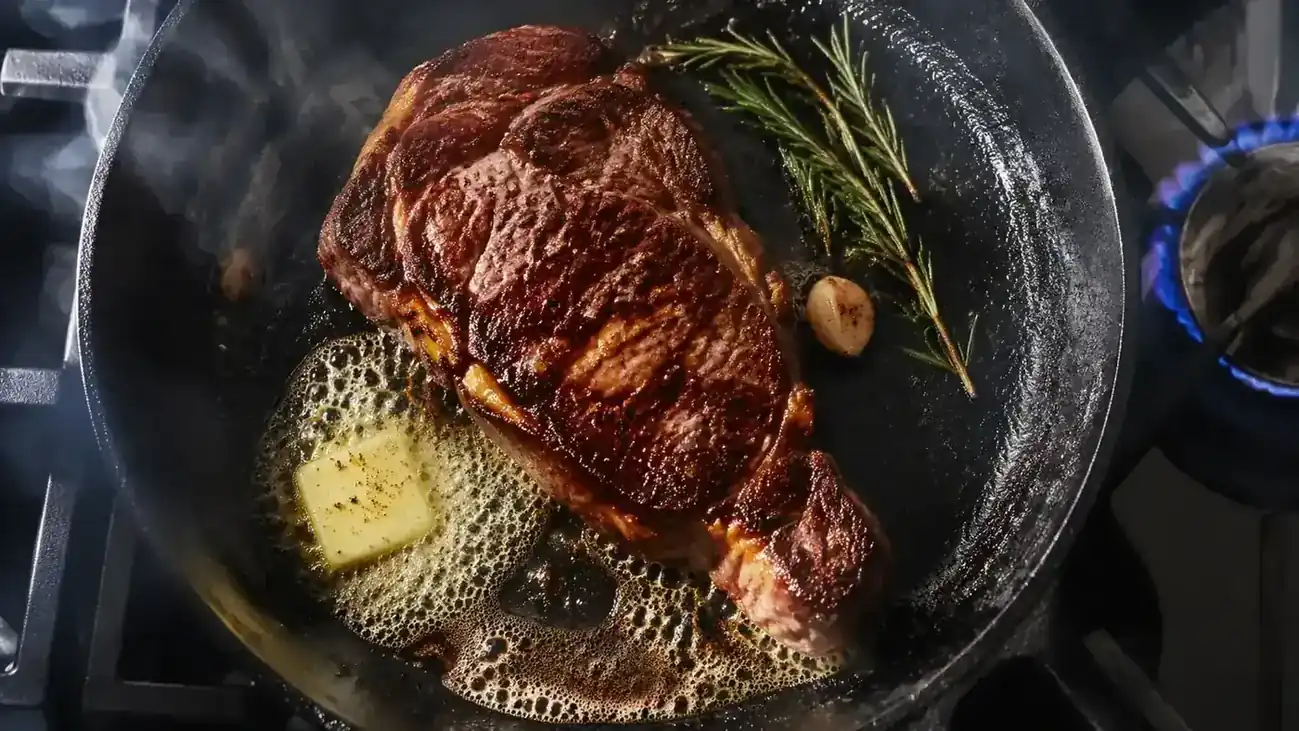
Add a high smoke-point oil, avocado or refined grapeseed, just enough to coat the pan, and lay the steak in away from you. You should hear an immediate, aggressive sizzle. If you don't, the pan wasn't hot enough and you should pull the steak back off and wait another minute. This sear is purely about color and crust now, the inside is already exactly where you want it.
Sear for 45 seconds to a minute per side, using tongs to also stand the steak up briefly on its fat cap if it has one, since rendering that edge is worth the extra 20 seconds. In the last 30 seconds, drop in a tablespoon of butter along with a smashed garlic clove and a sprig of thyme if you have it, tilt the pan, and spoon the foaming butter over the steak a few times. This is the flavor layer sous vide can't give you on its own, and it takes less than a minute total.
Rest the steak for three to five minutes before slicing, shorter than a traditionally cooked steak needs because there's no large temperature gradient to even out. Slice against the grain and you'll see the same rosy pink from edge to edge, no gray ring, no lucky pocket near the bone. That's the entire payoff of the first four steps, delivered in the last one.
What Else Helps
A few small habits make this method even more reliable once you've run it a handful of times. Keep a notebook, physical or in your notes app, logging the exact cut, temperature, and time for each steak you cook. Six months in, that log becomes more useful to you than any recipe card, because it reflects your exact pan, your exact preferences, and your family's exact taste. I also batch cook on Sundays now, running two or three steaks in the same bath at once since the water doesn't care how many bags share it, then searing portions fresh through the week. And always finish with a real sear in a screaming-hot pan, no exceptions, because sous vide gets you 80 percent of the way there and the stove finishes the other 20.
Freezing works better with this method than with almost any other cooking approach I've tested. I season and bag raw steaks individually, freeze them flat, and drop them straight into the bath from frozen, adding about 45 minutes to whatever the fresh cook time would be. It means a weeknight steak dinner is genuinely as easy as pulling a bag from the freezer at 4pm, no thawing required, no plan needed twelve hours in advance.
Temperature is doneness, not a guess based on touch or color. Once that clicks, you stop hovering over the pan and start actually trusting your steak to come out right.
Ready to stop guessing and start trusting your temperature?
The Anova Precision Cooker 2.0 is the tool that turned steak from my most stressful weeknight cook into my most reliable one. If you want the full breakdown of a year spent putting it through real weeknight use, read the <a href="/anova-sous-vide-review-long-term">long-term Anova review</a>, or see the other reasons it's stayed on my counter in <a href="/10-reasons-sous-vide-cooking-works">10 Reasons Sous Vide Cooking Works</a>.
Amazon Check Today's Price on Amazon →