
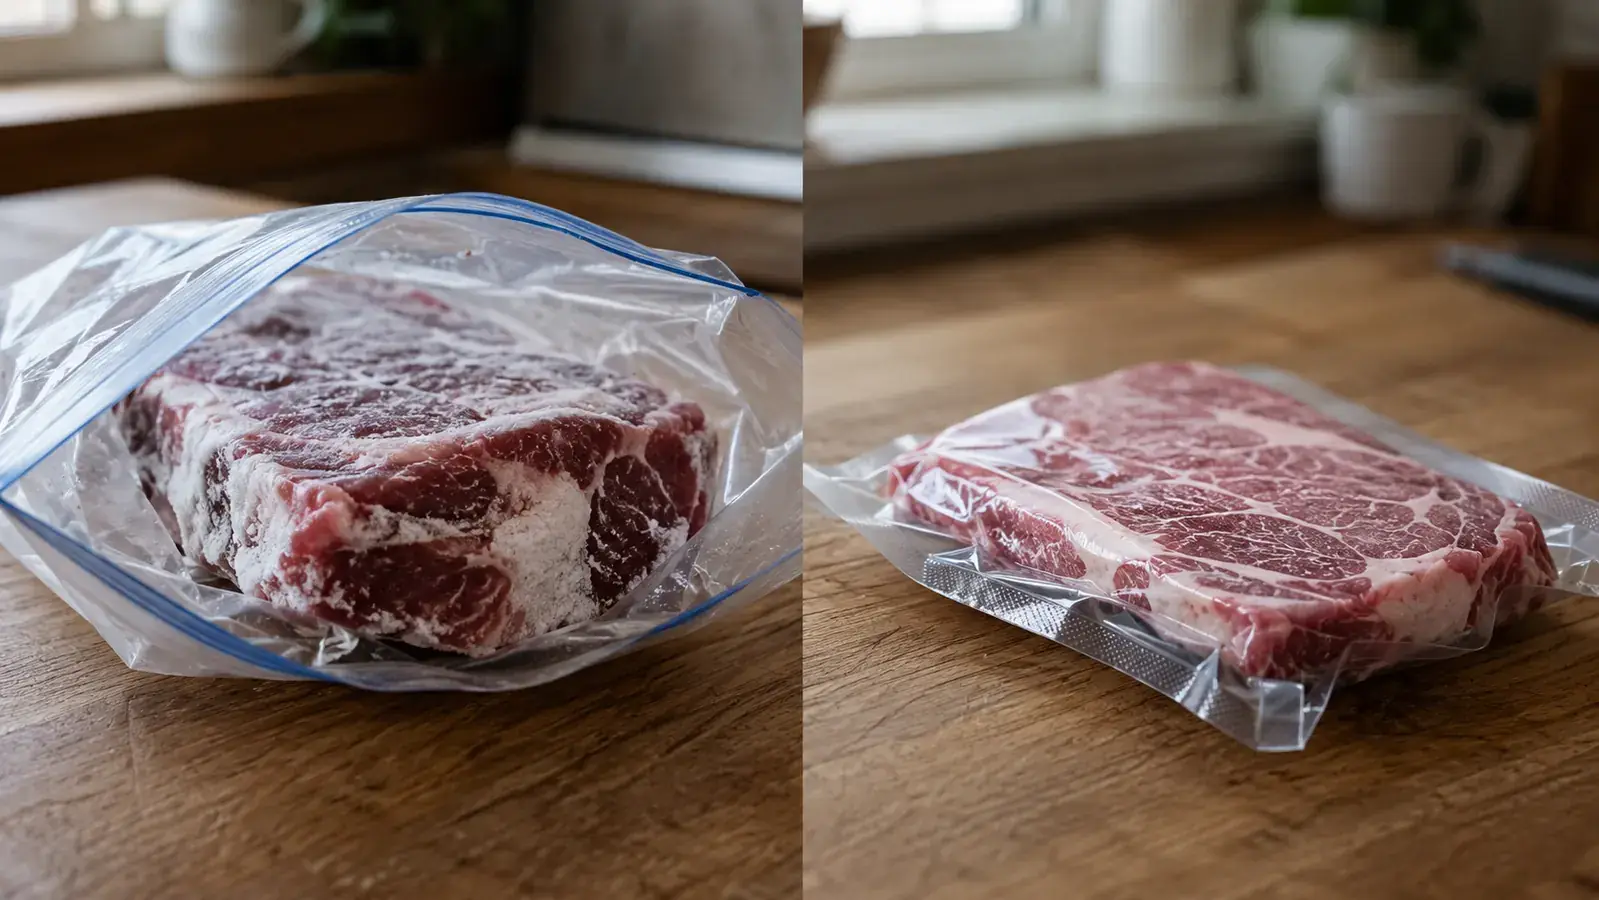
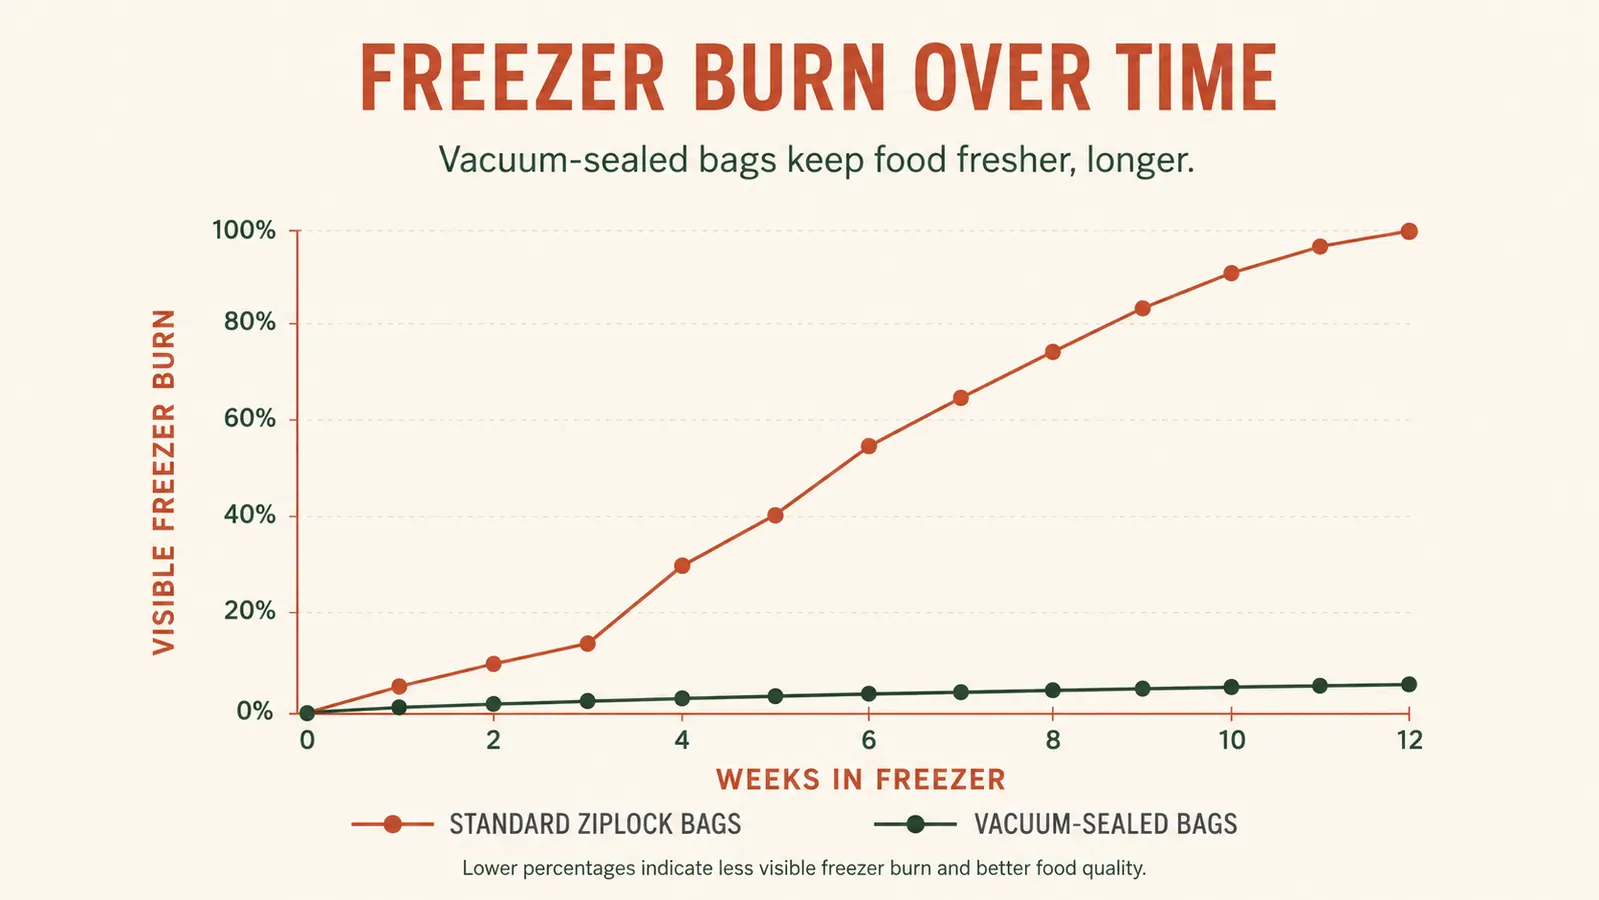
I threw away a pork shoulder two winters ago. Not because it went bad exactly, it just turned grey and leathery around the edges after eight weeks in a ziplock bag, and no amount of trimming made it worth cooking. That was the last straw. I'd already lost half a bag of shrimp and a whole loaf of sourdough to the same white, freezer-burned crust, and I was done pretending regular bags were good enough for anything staying frozen longer than two weeks.
Freezer burn isn't really about temperature. It's about air. Trapped air inside a bag lets moisture migrate out of the food's surface and refreeze as those ice crystals you see, which is what turns the texture dry and pulls flavor with it. The fix is boring but it works: get the air out before the food ever goes in the freezer. That's the whole job of a vacuum sealer, and it's why I run my Nesco VS-12 almost every Sunday now instead of reaching for a box of ziplock bags.
What follows is the exact routine I've settled on after roughly two years and close to 200 sealed bags, meat, bread, soup, even coffee beans. None of it is complicated, but the order matters, and skipping any one step is usually why people try vacuum sealing once, get a mediocre result, and go back to what they were doing before.
For what it's worth, I don't think freezer burn is a sign of a bad freezer or bad food. It's almost always a packaging problem, and once I started treating it that way instead of blaming the appliance, everything got simpler. The steps below aren't theory, they're just what happens when you take the air problem seriously and build a five-minute habit around solving it every single time.
Stop losing groceries to frost. Vacuum-seal them instead.
The Nesco VS-12 pulls a tight, air-free seal in under a minute per bag, which is the single biggest factor in whether meat, bread, or leftovers survive the freezer without turning grey and dry.
Amazon Check Today's Price on Amazon →Step 1: Chill or freeze the food first
This one trips up almost everyone the first time. Vacuum sealing liquid-heavy food while it's warm or wet pulls juice straight into the machine's motor, which is how people burn out cheap sealers in a few months. Before I seal raw meat, I pat it dry with a paper towel and let it sit in the fridge for at least 20 minutes. For soups, stews, or anything mostly liquid, I freeze it flat in a shallow dish or a reusable silicone tray first, then transfer the frozen block into the bag. Solid, cold, and dry is what the machine wants to see.
I learned this the hard way with a bag of marinated chicken thighs that hadn't drained long enough. The machine sucked marinade right up the tube, the seal came out weak and wrinkled, and the bag failed inside of three weeks in the freezer. Now I keep a wire rack over a plate in the fridge specifically for pre-sealing drainage. It sounds fussy, it takes about two extra minutes, and it's the difference between a seal that holds through March and one that quietly lets air back in by February.
The same rule applies to leftovers. Hot soup or sauce needs to come all the way down to fridge temperature before it goes anywhere near the sealer, not just off the stove and cooled on the counter for ten minutes. I've started portioning leftovers into shallow containers specifically so they chill faster, which also happens to make the frozen block the right shape to slide into a bag without wrestling it.
Step 2: Cut the bag with real extra room
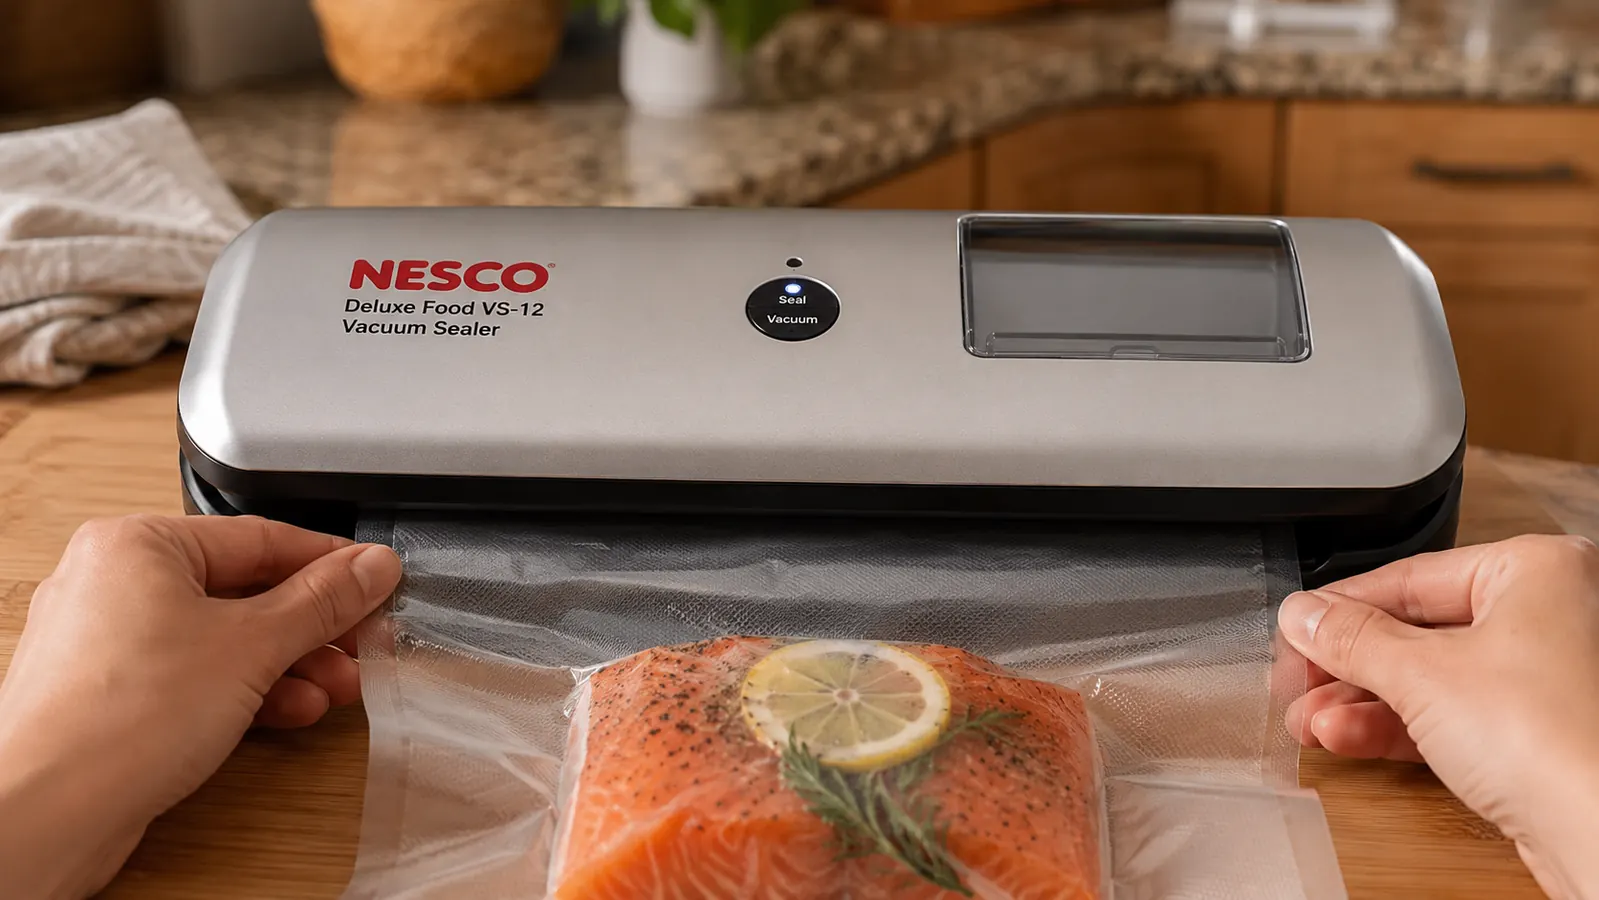
I used to cut bags exactly to the length of the food, thinking I was saving material. That's backwards. You need at least three inches of empty bag between the food and where the seal bar closes, because the Nesco's sealing strip needs clean, dry plastic to bond to itself. If food debris or moisture gets anywhere near that strip, the seal comes out with a gap you won't notice until the bag is already in the freezer losing its vacuum.
For anything with sharp edges (bone-in chops, rib tips, whole fish) I also fold a paper towel over the corner before sealing. It's a cheap trick that stops a bone from puncturing the plastic during the vacuum draw. I've sealed close to 200 bags this way over two years and I can count the punctures on one hand, all from times I skipped the paper towel because I was in a hurry.
One more thing worth mentioning: wipe the inside edge of the bag with a clean, dry paper towel right before you close the lid, even if it looks fine. Fat, flour, and small food particles are invisible on the plastic but they're exactly what a weak seal is made of. It takes five seconds and it's saved me from more failed seals than I'd like to admit.
Step 3: Use the right bag texture, not just any plastic
Regular sandwich or freezer bags will not hold a vacuum seal, even if you run them through the machine. They're too smooth for the channel to pull air through evenly, and the seal itself won't bond the same way. The embossed, channeled bags that come with the Nesco kit (or any compatible vacuum bag roll) have tiny ridges that let air travel to the pump during the draw, which is what actually creates the tight, wrinkled, shrink-wrapped look you want.
I buy the rolls in bulk now and cut them to size for whatever I'm sealing that week, whether that's a single steak or four pounds of ground beef divided into one-pound portions. Buying the roll instead of pre-cut bags has probably saved me close to a third on bag costs over the past year, and I never run out mid-project the way I used to with the pre-made ones.
It's also worth keeping two roll widths on hand if your machine supports it. I use the narrower roll for individual chicken breasts and fish fillets, and the wider one for whole roasts or a week's worth of soup portions bagged in a single long strip that I cut apart with scissors after sealing. It cuts down on wasted plastic and counter time both.
I also rinse and reuse bags when the contents weren't raw meat, things like bread, cheese, or roasted vegetables. As long as the seal edge is trimmed clean before reuse, a bag can go through the machine two or three more times before the plastic gets too thin to trust with anything you actually want to protect.
Step 4: Run the full seal cycle, don't rush it
The Nesco VS-12 has a viewing lid, which sounds like a small thing but it changed how I use the machine. I can actually watch the vacuum pull the air out and see the bag go from puffy to skin-tight before the sealing bar comes down. If you're using a machine without a window, or you're new to this, resist the urge to open the lid early. Cutting the cycle short is the single most common reason a seal fails within days instead of lasting months.
I also press gently on the bag after it comes out to check for any soft spots or air pockets that didn't fully collapse. If I find one, especially near a bone or an odd-shaped cut, I reseal it right there rather than trusting it to the freezer. It takes maybe 15 extra seconds and it's saved me from more than one mushy, half-thawed surprise months later.
If you're sealing something delicate, soft cheese, berries, a slice of cake, most machines including the VS-12 have a gentler pulse or manual mode instead of the full automatic draw. I use it more than I expected to. Full-power suction will flatten a raspberry into pulp, and a manual pulse lets you stop the moment the air is out but before the food gets crushed.
Step 5: Label, date, and lay flat
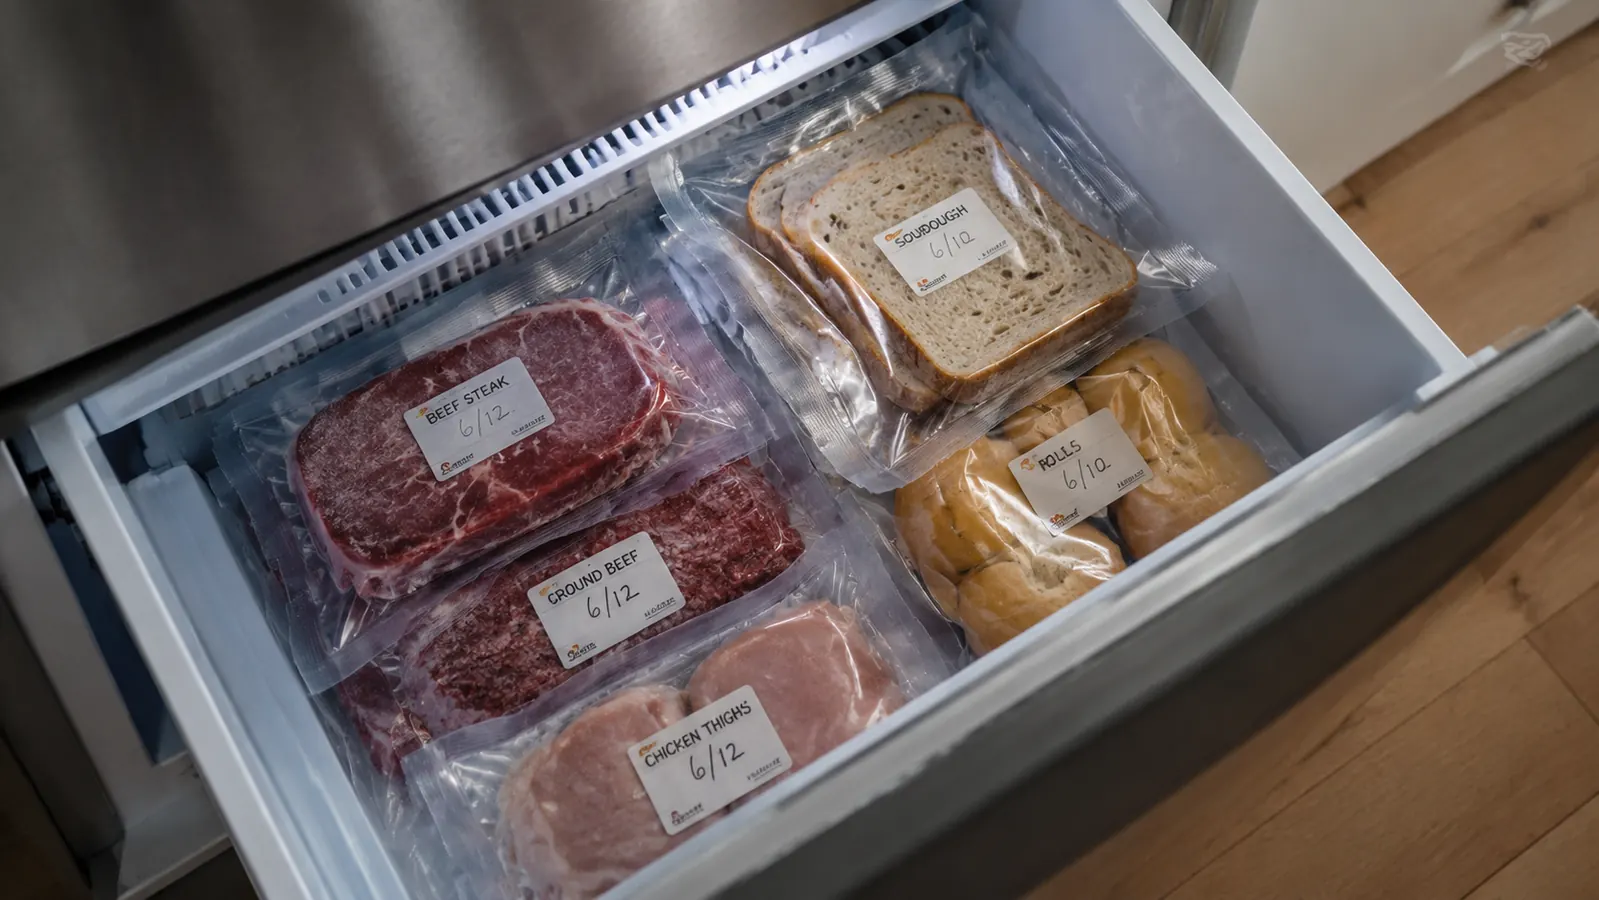
This step has nothing to do with the machine and everything to do with actually using what you freeze. I write the contents and the date on every bag with a permanent marker before it goes in, because a vacuum-sealed bag of ground turkey looks identical to a vacuum-sealed bag of ground beef once it's frozen solid. I also lay everything flat on a sheet pan until it's frozen through, then stack the bags on their edge like files in a drawer. It maximizes freezer space and, more importantly, it means I can actually find what I'm looking for without digging through a frozen pile.
Flat, labeled bags also thaw faster and more evenly than a lumpy freezer bag of the same food, which matters more than people expect. A one-inch-thick sealed portion of chicken breast thaws in a bowl of cold water in about 25 minutes. The same amount crammed into a round ziplock takes closer to an hour and thaws unevenly, with the outside starting to warm before the center gives up its ice.
What Else Helps
A vacuum sealer solves the air problem, but two other habits stretch its results even further. First, keep your freezer at 0°F or colder and try not to let the door sit open while you dig around, since temperature swings speed up ice crystal formation even inside a sealed bag. Second, portion before you seal. Sealing a whole three-pound roast in one bag means you're breaking that seal the first time you only need half of it, which puts the rest right back at risk. I portion almost everything into meal-sized amounts before it ever touches the machine, even if it takes an extra ten minutes on a Sunday.
I also do a quick freezer rotation every couple of months, pulling everything forward so the oldest sealed bags sit at the front where I'll actually see and use them. A vacuum seal buys you months of extra freshness, not forever, and even a well-sealed bag benefits from being eaten before the year mark instead of sitting untouched behind newer groceries.
One last thing I'd tell anyone starting out: don't judge the machine by your first bag. My first two or three seals were mediocre because I rushed the drying step, and it took a handful of tries before the routine above became automatic. Once it did, freezer burn stopped being something I worried about at all, which for someone who used to toss food every couple of months is a real change, not a small one.
The bag isn't what stops freezer burn. The absence of air is. Everything else is just technique in service of getting the air out and keeping it out.
Your freezer shouldn't be where good groceries go to die.
If you've thrown out freezer-burned meat, bread, or leftovers more than once this year, a proper vacuum seal fixes the actual cause instead of just delaying the problem.
Amazon Check Today's Price on Amazon →